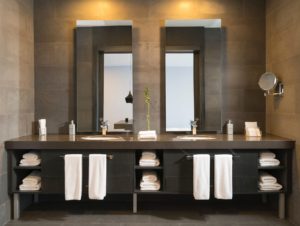
 Hydrotherapy, the use of water for therapeutic purposes, has become increasingly popular in recent years. Immersing yourself in cold water can provide both physical and mental benefits, from reducing inflammation to alleviating depression. While many seek out these treatments at spas or dedicated facilities, it’s possible to create your own cold plunge experience right at home. In this article, we’ll walk through the steps for designing and building a home cold plunge room.
Selecting the Right Space
When choosing where to locate your cold plunge, there are a few key factors to consider:
- Accessibility – Pick a space that is easily accessible from your living area or bedroom for convenience. If this isn’t possible, you may want to look into a private garden cabin that is easy to reach.
- Size – Ideally your cold plunge tub or pool should accommodate your full body, so measure out at least a 5 by 6 foot space.
- Plumbing – You’ll need access to water lines for filling and draining the tub. Try and locate your tub near existing plumbing infrastructure if possible.
- Ventilation – Proper ventilation is essential to prevent mold growth. Choose a space that has windows or vents that can be opened if building inside.
- Privacy – Most people don’t want their cold plunging on full display, so opt for a space away from heavy foot traffic.
Sourcing Materials
When it comes to the actual cold plunge tub or pool itself, you have options:
- Purpose-built tubs – Fiberglass or acrylic tubs designed for hydrotherapy are available but they can be pricey. Make sure to choose an insulated tub.
- Stock tanks – Galvanized stock tanks are an affordable option commonly used for cold plunges. Barrels are very space efficient and make a good choice for those short on room.
- Kiddie pools – For a budget choice, large heavy-duty plastic kiddie pools can work. Just be sure to clean them thoroughly first.
- Custom tile – For a built-in look, you can also use a waterproof liner and tile to create a custom in-ground spa pool.
Plumbing and Water Lines
You’ll need a way to conveniently fill and drain your cold plunge. Most home DIYers rely on:
- Garden hose – Easily attach to existing outdoor spigots for fast filling. Use a submersible pump in the tub for draining.
- Dedicated water lines – For a permanent setup, have plumbing lines installed directly to your tub controlled by shutoff valves.
- Chiller – To get the water extra cold, you can use a portable chiller or dehumidifier with a cooling function.
- Filtration – While not essential, you can filter the water for more sanitary soaks. An aquarium tank filter works for smaller tubs.
Safety and Convenience Upgrades
Some optional additions to make your home cold plunge more user-friendly include:
- Steps/ladder – Makes it easier and safer to get in and out of the tub. Stainless steel or composite steps work well.
- Towel bars and hooks – So you can conveniently keep towels and robes within reach.
- Emergency shutoff switch – If ever needed, you’ll be able to quickly cut power to the chiller.
- Shelving – Provides storage for bath accessories like brushes, shower shoes, and spa masks.
- Lighting – Install waterproof LED lighting to set the mood.
Start Plunging
Once your cold plunge is set up, be sure to start slowly and don’t overdo it. Limit your initial plunge sessions to 1-2 minutes and see how your body reacts. Slowly increase the duration while monitoring your comfort level. Listen to your body, relax and enjoy all of the revitalizing benefits of home hydrotherapy.


